React x TypeScriptでInstagramの投稿をサイト上に表示したかったときの備忘録
使用したGraph APIはv14.0だけど12.x, 13.xあたりも同じっぽい(多分)(未検証)
全体的な流れのうち、1, 2は書くのめんどいので割愛
- Instagramをプロアカウントに変更する
- facebookとInstagramをリンクさせる
- facebook developerアカウントでアプリの作成
- Graph APIで使用するアクセストークンの有効期限の延長
- instagram business idの取得
- instagramの投稿の取得してサイトに表示する
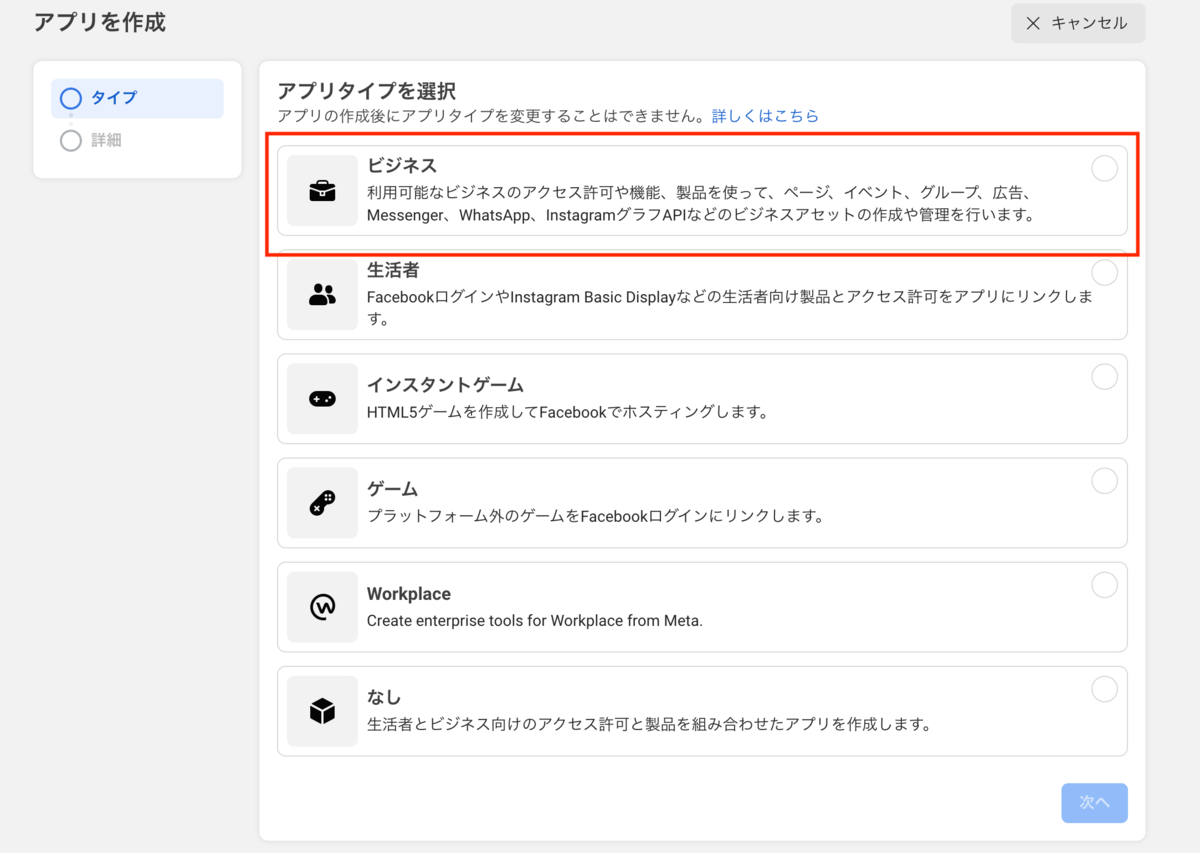
1. facebook アプリの作成
アプリタイプにビジネスを選択してアプリの作成
基本情報は適当に入力してアプリ作成後に表示されるアプリID・app secretをメモっておく

2. 無期限アクセストークンを取得する
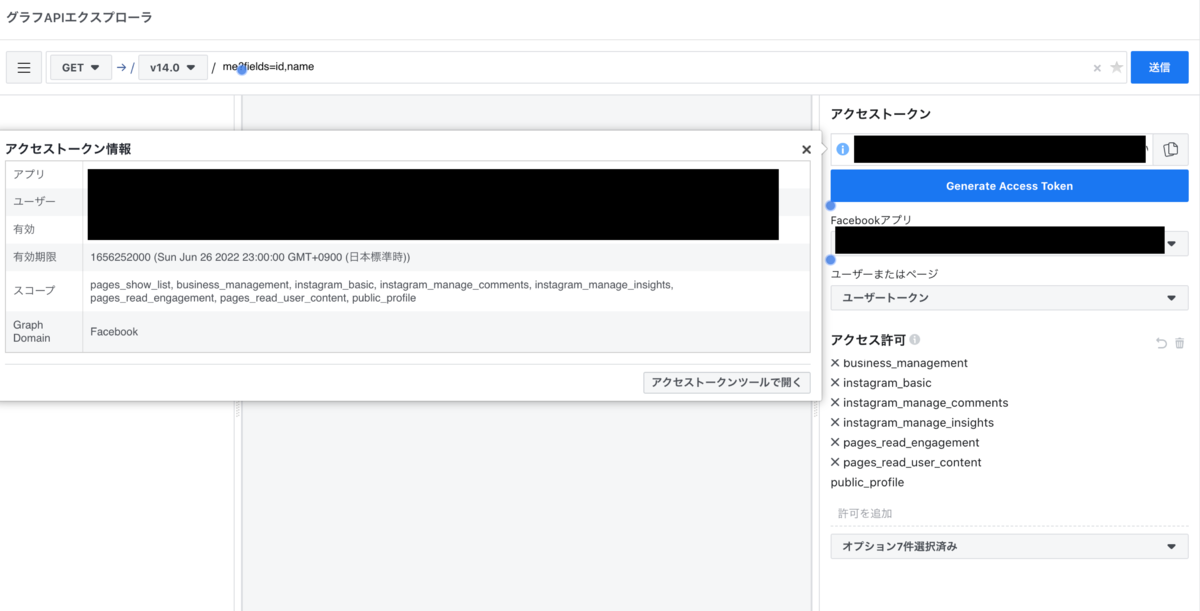
①グラフAPIエクスプローラ画面で短期アクセストークンを取得する
以下の項目を指定する
インスタの投稿だけだし instagram_basic しか使わんだろって思って instagram_basic と public_profile のみにしてたら無期限アクセストークンが取得できなくてハマった。(公式読め)
② Generate Access Token を押すとアクセス許可のためのダイアログが表示されるから許可
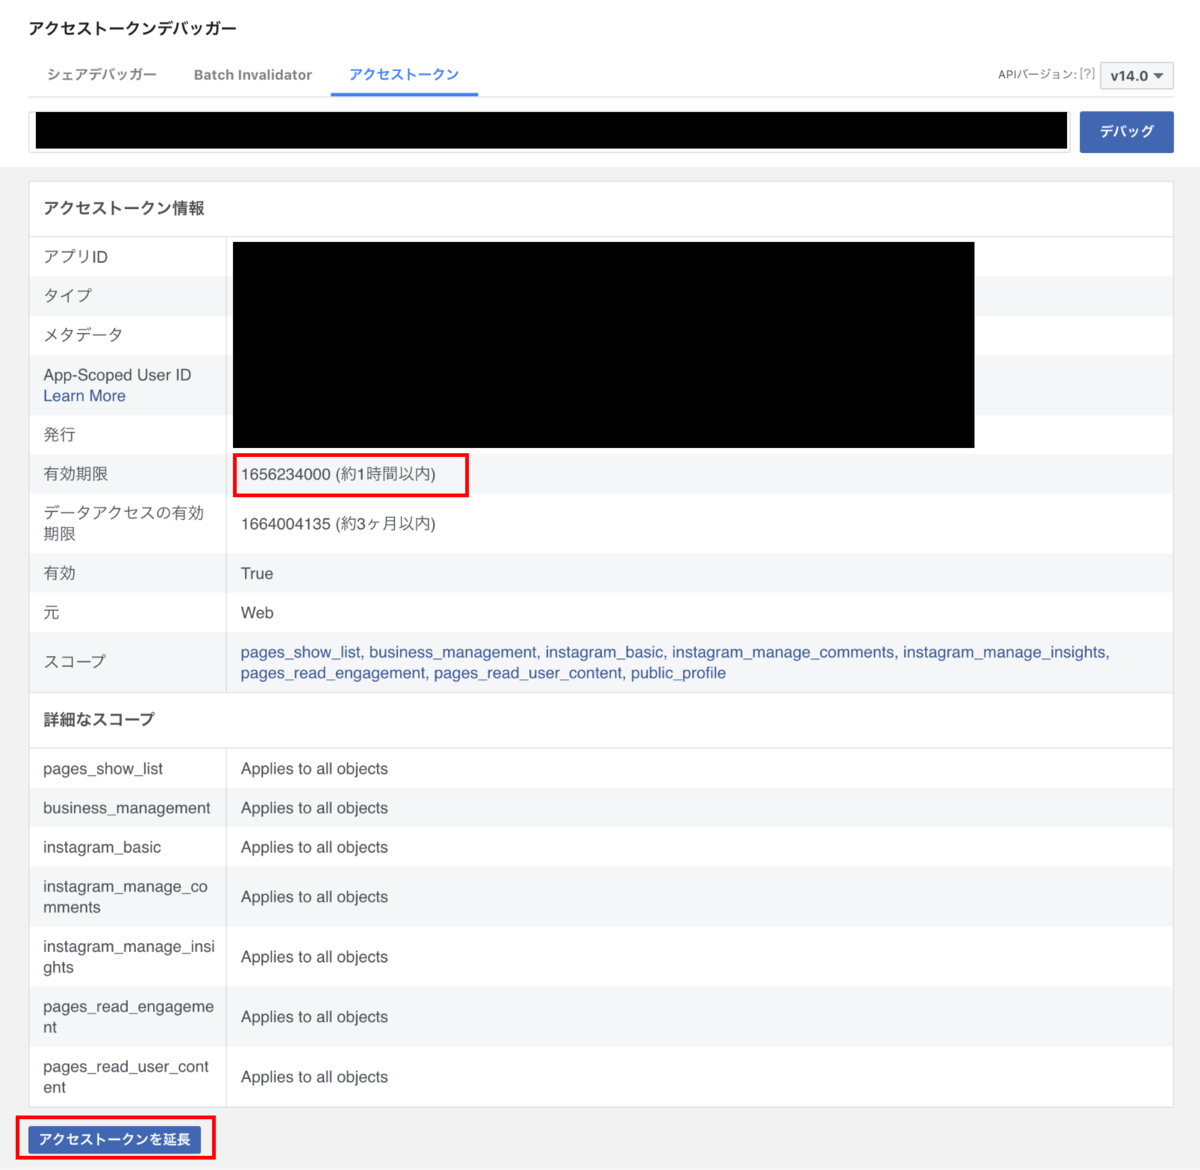
③アクセストークン左のinfoマークを押してアクセストークンデバッガーの画面に行く
有効期限が1時間以内になっているので「アクセストークンを延長」を押す
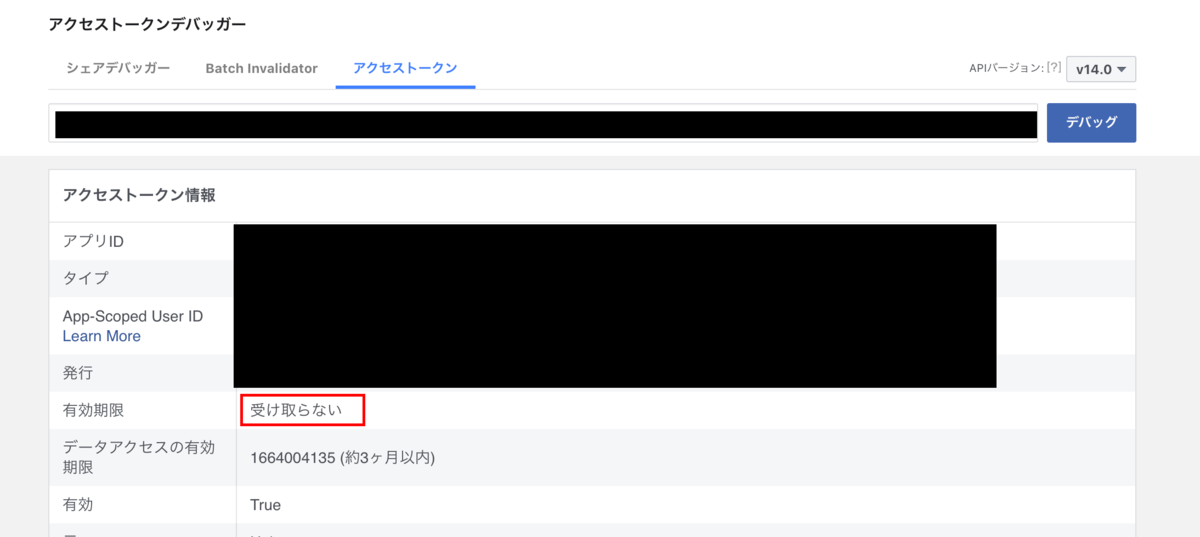
④ 長期アクセストークンが表示されるのでデバッグボタンを押す

発行されたアクセストークンの有効期限が「受け取らない」になってればOK
3. instagram business id を取得する
グラフAPIエクスプローラ画面か、Postmanとかで↓を叩くと、
https://graph.facebook.com/v14.0/me?fields=accounts{instagram_business_account}&access_token=[2.で取得したアクセストークン]1
↓下記の形式でデータが戻ってくるので accounts.data.instagram_business_account.id をメモっておく
{
  "accounts": {
    "data": [
      {
        "instagram_business_account": {
          "id": "123456"
        },
        "id": "123456"
      }
    ],
    "paging": {
      "cursors": {
        "before": "xxxxxx",
        "after": "xxxxxx"
      }
    }
  },
  "id": "123456"
}
4. instagramの投稿の取得
https://graph.facebook.com/v14.0/[3で取得したinstagram business id]?fields=media.limit([取得したい件数]){[取得したいfieldをカンマ区切りで指定]}&access_token=[2で取得したアクセストークン] 2 (URLに()使うのモヤる)
をPostmanとかで叩くと、↓の形式で戻ってくるので media.data を使ってサイトに描画する
{
  "media": {
    "data": [
      {
        "media_url": "https://scontent.cdninstagram.com/v/xxxxxxxxxxxx/",
        "media_type": "CAROUSEL_ALBUM",
        "id": "123456"
      }
    ],
    "paging": {
      "cursors": {
        "before": "xxxxxxxxxxxx",
        "after": "xxxxxxxxxxxx"
      },
      "next": "https://graph.facebook.com/v14.0/xxxxxxxxxxxx"
    }
  },
  "id": "123456"
}
5. 記事の取得
export default class Instagram {
  public async fetchPosts(limit: number): Promise<Post[]> {
    return await axios
      .get(
        `https://graph.facebook.com/${process.env.GRAPH_VERSION}/${process.env.GRAPH_BUSSINESS_ID}`,
        {
          params: {
            fields: `media.limit(${limit}){media_url,thumbnail_url,permalink,media_type}`,
            access_token: process.env.GRAPH_ACCSESS_TOKEN,
          },
        }
      )
      .then((res) => res.data.media.data)
      .catch((error) => {
        console.error(error);
      });
  }
}
(※ import などは省略)
今回はReactで実装
<section>
  {this.props.posts.map((row: Post, index: number) => (
    <Box {...row} key={index}></Box>
  ))}
</section>
最終的に↓みたいなマークアップで描画されればOK
<a target="_blank" rel="noopener noreferrer" href="https://www.instagram.com/p/xxxxxx/">
  <img src="https://scontent.cdninstagram.com/v/xxxxxx">
</a>
参考
developers.facebook.com developers.facebook.com developers.facebook.com developers.facebook.com
※本記事は2022/06/26時点の情報です。
株式会社エイルシステムではWebエンジニア・モバイルアプリエンジニアを募集しています。
実務経験がなくてもOKです。ご興味のある方は弊社HPよりご連絡ください。
![]()